How to start with Arduino
So, you have to begin with Arduino.Arduino is a very great electronic board to start your journey in electrnoics world. You have arrived at a great platform where you would get complete begineer guide towards Arduino.In this session we would look how to start with Arduino and perform your first exercise on it.
So, Lets Begin
You will Need
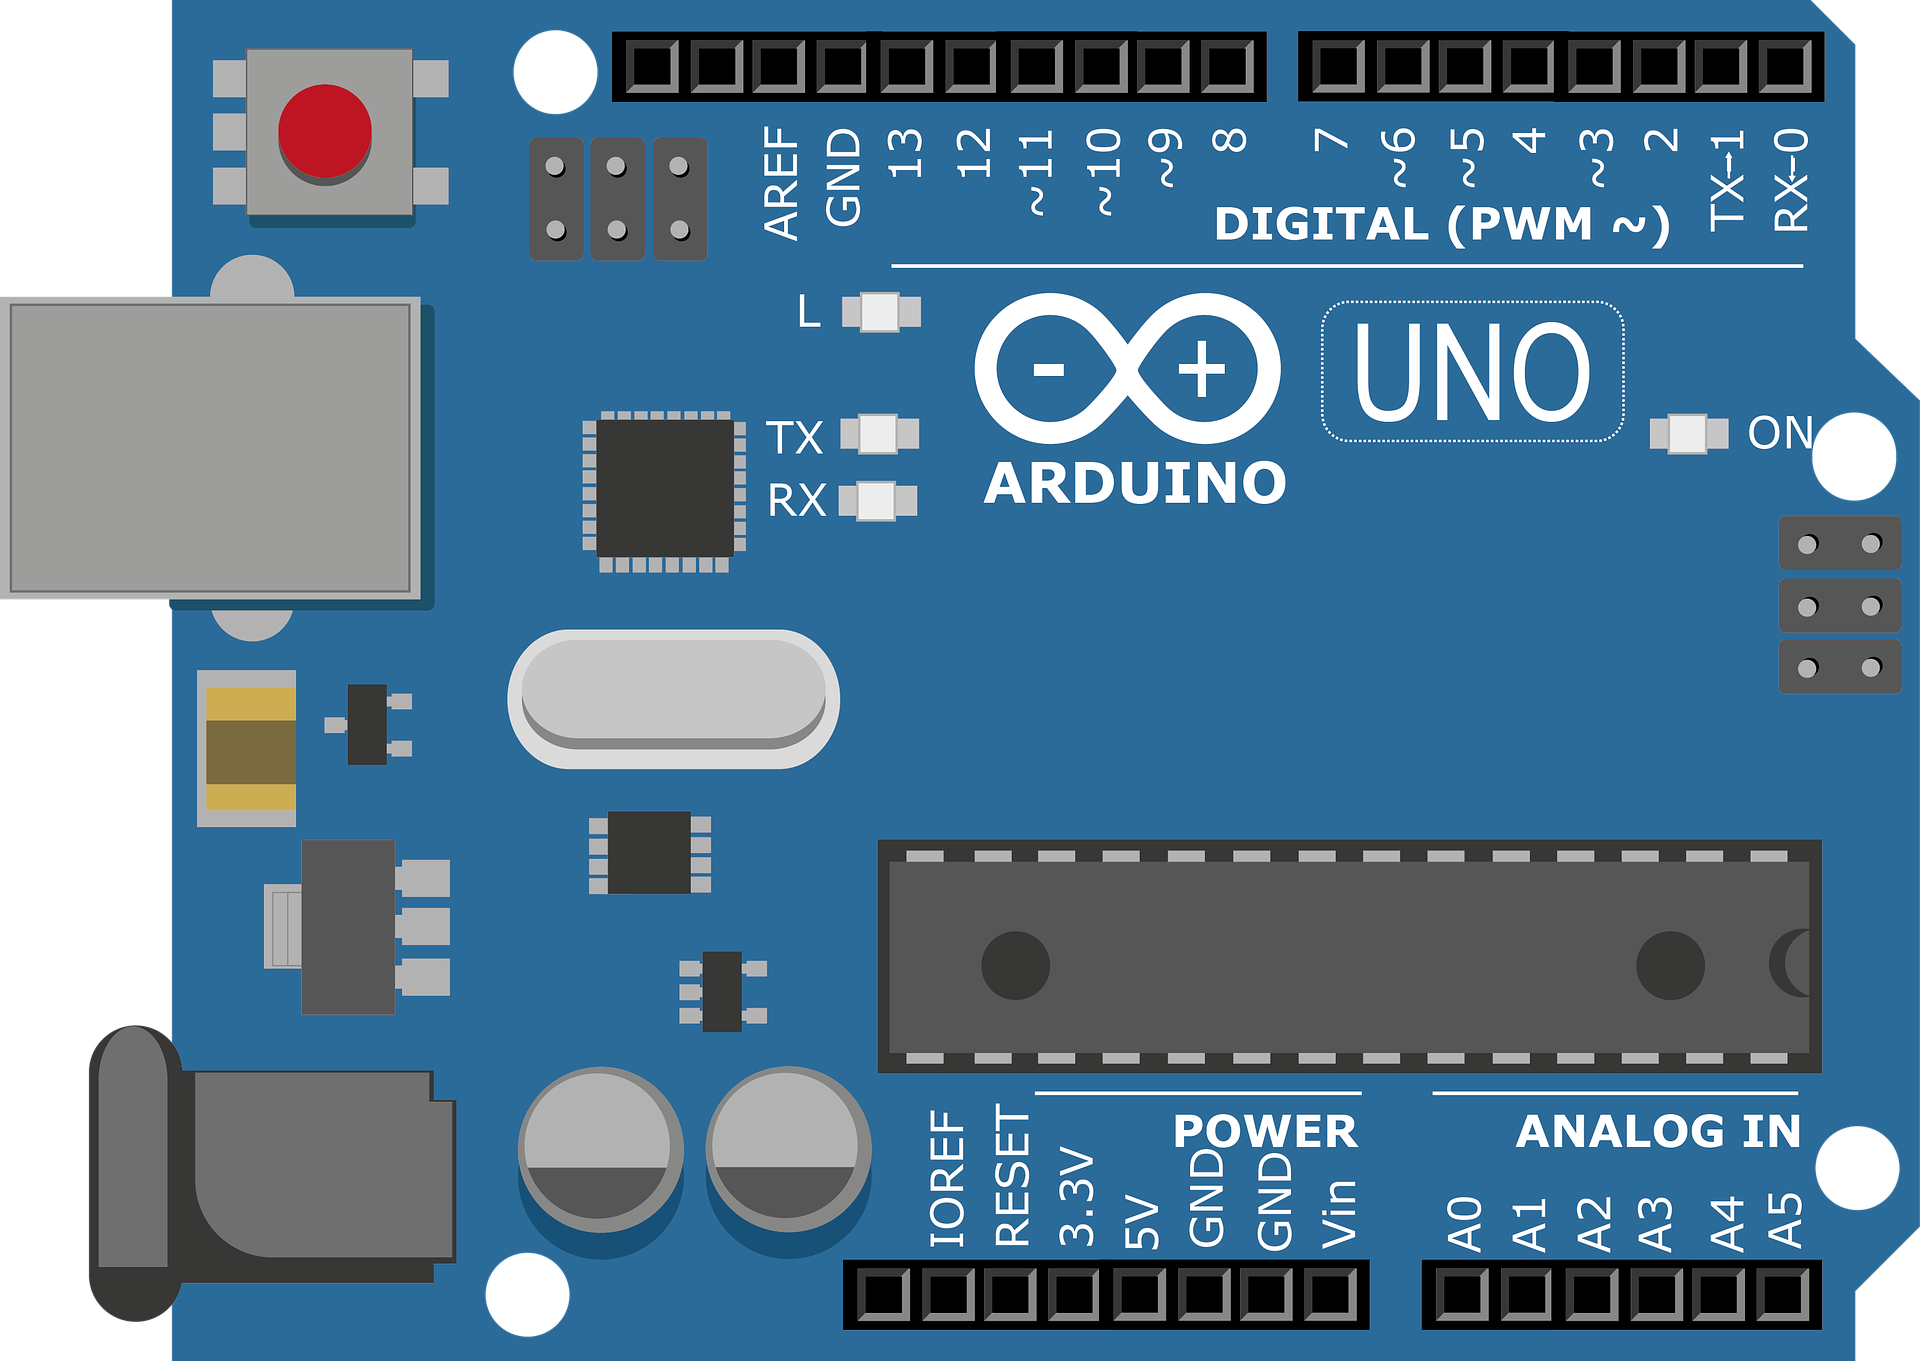
- Arduino Uno
- Arduino Cable
- Any OS (Windows, Mac, Linux)
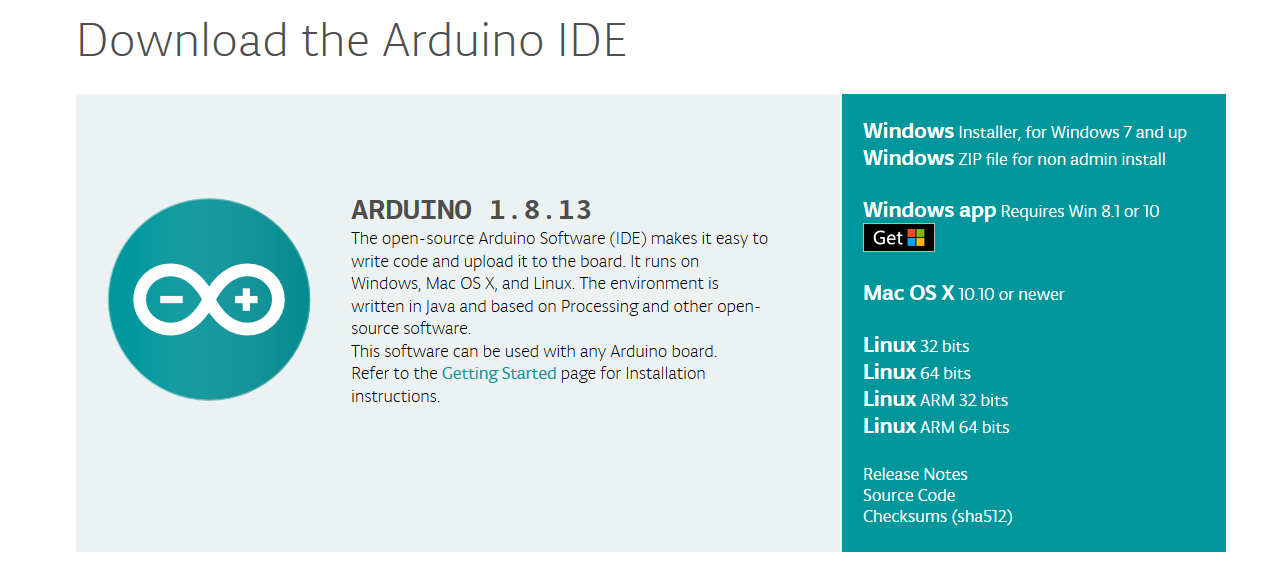
- Arduino IDE(Use this link to download Arduino IDE)
- Your excitement for explore the Arduino
Step 1:-> Download the Arduino IDE
We have provided the link to the Arduino IDE software above, you can download it from there for free, Yes!!! it is totally free......, After downloading it would take few steps to install it on your system and BOOM!! You are ready to go with Arduino.
Step 2:-> Know your Arduino's COM Port
Confused.., Don't Worry we are here to help you what. Connect your Arduino Board to your System , Now go to Device Manager and look for COM & ports and look for your Arduino's COM.. Still Stuck, Contact us from top of this page.

Step 3:-> IDE Configurations
As you have connected your Arduino Board to your system now open the Arduino IDE and look for Boards -> Tools > Board > Arduino/Genuino Uno

Now, you have to setup the COM Port of Arduino by navigating to Tools > Port > Select your Port
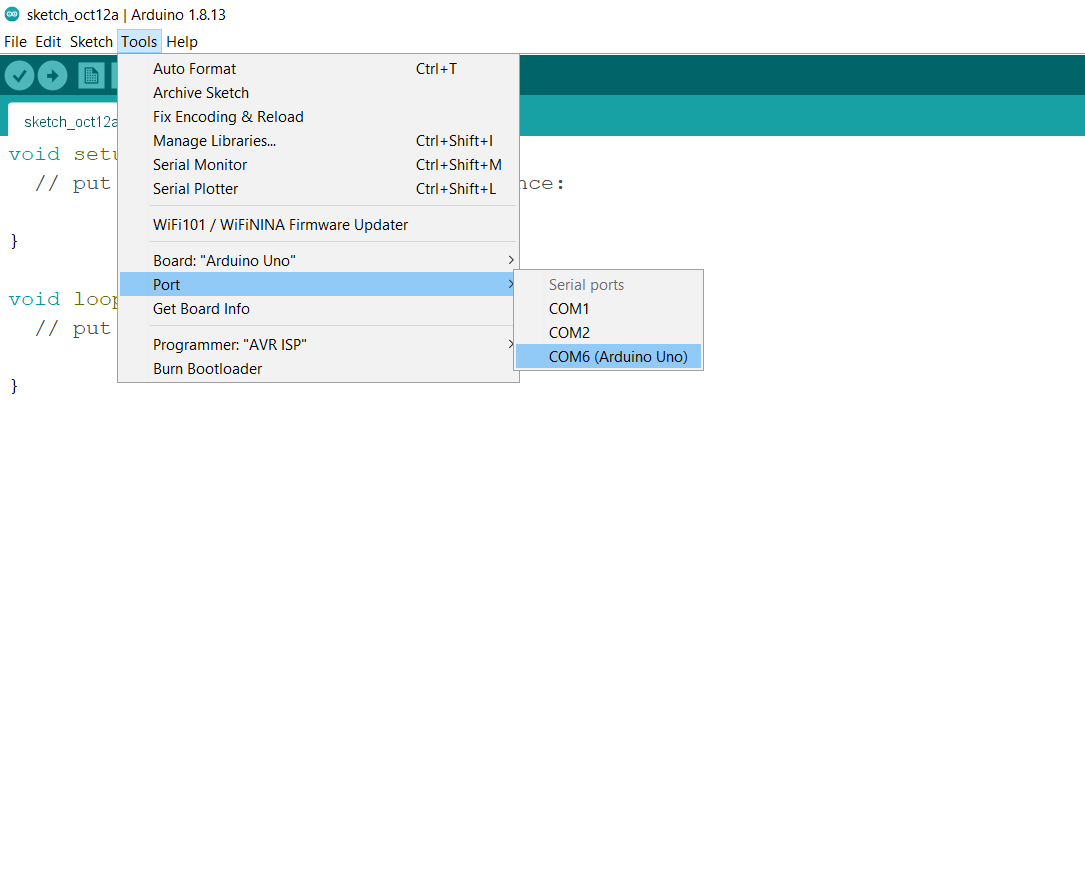
Note: Everyone's port are different so please check your Port Correctly..
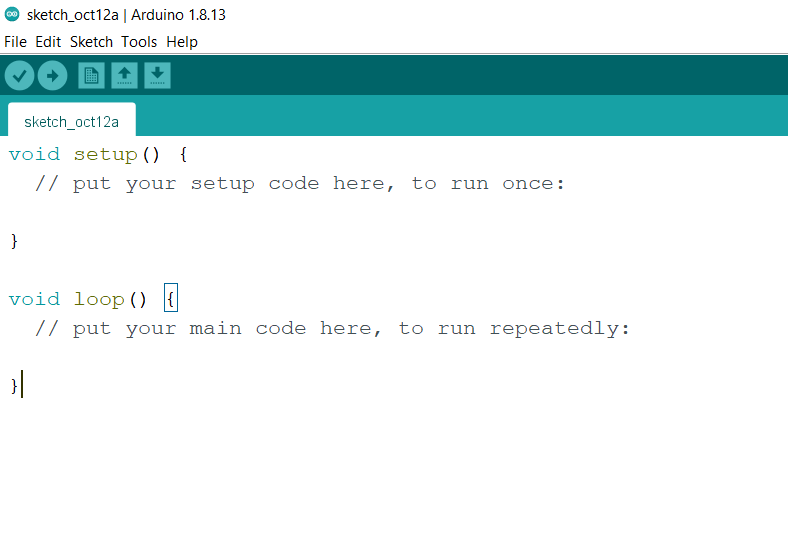
Step 4:-> Now Let's write our First Arduino Program
Lets create a New File in our Arduino Documents. Then you will see two things {void setup() void loop()}
-
Void Setup():- is this Function, which runs when you power up your Arduino Board
-
Void Loop():- is this function, which runs in a loop continously, untill poeer from rduino is removed.
Now, Let us write our First Code. In this Session we would write a code to blink the led
with 1 sec delay, So.. Let's begin
                            void setup(){


                            // initialize digital pin LED_BUILTIN as an output.

                            pinMode(LED_BUILTIN, OUTPUT);
                            }


                            // the loop function runs over and over again forever

                            void loop() {


                            digitalWrite(LED_BUILTIN, HIGH); // turn the LED on (HIGH is the voltage level)
                            delay(1000); // wait for a second
                            digitalWrite(LED_BUILTIN, LOW); // turn the LED off by making the voltage LOW
                            delay(1000); // wait for a second

                            }
Copy this Code to your Arduino File OR You can also open Files > Examples > Basics > Blink Code
Now you have to Follow some last steps
- First Compile the Code
- Now Upload the Code to the Arduino Board
Now you can see the LED on the Arduino Board Start blinking with 1sec delay
You can also change the delay time by changing the value in delay() function
void setup(){
// initialize digital pin LED_BUILTIN as an output.
pinMode(LED_BUILTIN, OUTPUT);
}
// the loop function runs over and over again forever
void loop() {
digitalWrite(LED_BUILTIN, HIGH); // turn the LED on (HIGH is the voltage level)
delay(1000); // wait for a second
digitalWrite(LED_BUILTIN, LOW); // turn the LED off by making the voltage LOW
delay(1000); // wait for a second
}